A step-by-step guide to installing a bathtub liner can make completing the process of updating your bathroom a lot easier than a full remodel. Tub liners are a cost-effective option that slides right over your existing tub and provides a brand-new look and design style, and longevity. We want to share an outline of everything that you need, from preparation to the installation phase, in order to obtain a neat and professional look. If you’re doing it yourself or calling in our troops at TurnKey Bath Remodel, procedures make a difference.
Key Takeaways
Measure the tub so the liner fits perfectly. Exact measurements prevent installation problems and guarantee a smooth aesthetic.
Select a premium liner that fits your tub material. Quality materials guarantee years of durability and resistance to warping or cracking.
Check your tub for any structural problems, like cracks or leaks. It’s best to take care of these issues up front to avoid damaging the liner and to make sure it adheres well.
Clean and prep your tub to perfection by taking out hardware, DEEP cleaning the surface, and laying down primer. A clean, smooth surface is imperative for proper adhesion and an expert finish.
Dry fit your liner before putting down any glue. This prep guarantees the liner fits properly and minimizes installation errors.
Finish by caulking the edges and reinstalling fixtures. These final touches safeguard against water seeping and add back all the functionality.
Preparing for Installation
The most important aspect of every successful tub liner installation is effective preparation so that the liner will fit properly and function well, as well as look seamless. The important steps in preparing for tub liner installation are:
Get the Measurements of the Bathtub
Measurement is of great importance. Use a tape measure to measure from one end of the tub to another along its length, its width, and its depth. Consider also any curves or angles. Measure at more than one spot to account for inconsistencies, like if flared walls are present, ensuring the liner fits perfectly without any gaps.
Select the Right Liner
Liner concerning material and design. Acrylic liners are tough, while PVC liners are lightweight. Test-fit the liner in the tub without adhering it in place to see if it really follows the design and other openings of fixtures.
Inspect for Structural Problems
Look at the old tub before installation: cracks, rust, and water damage can all lead to underlying problems. Structural problems should be fixed before beginning to install the new liner, such as the sealing or replacement of a rusted drain. Thorough cleaning of the tub with a non-abrasive cleaner is required to remove soap scum and oil.
Final Steps Before Installation
Once the liner fits perfectly into the tub, the last touch is to lightly glue the bottom and sides of the tub to avoid excess spillage from the liner. Adhere the liner and press the parts at the ends. The glue can rest for 24-48 hours.
Cleaning and Prepping the Surface
The prepping of the old tub is a necessary process for a successful tub liner installation because a clean, smooth surface can achieve strong bonding and an extended service life. If this step is skipped, it will only encourage poor adhesion, water damage, and eventually premature failure.
Remove Old Hardware
In order to gain access to the tub surface for cleaning, remove hardware like faucets and drain covers. Use a screwdriver or wrench to carefully remove each part, saving screws for use later. If any of the hardware is rusted or broken, it would be best to replace it.
Deep Cleaning of the Tub
Get rid of any residue, including soap scum, mildew, and minerals. Start with a chemical-free cleaner, then use a stiff-bristle brush to scrub any tough spots. For heavy buildup, you may apply a tub cleaner or create a paste of baking soda and vinegar. Give extra attention to cracks or chips, clean them, and fill them in with filler. Rinse thoroughly and allow the tub to dry. Any moisture left will affect the liner installation.
Apply Primer for Adhesion
Once the tub is clean and dry, apply a bathtub liner primer to enhance adhesion. Use a paintbrush or roller to coat the tub; let it cure in line with the manufacturer’s instructions before laying in the liner.
Installing the Tub Liner
After installing your tub liner, these finishing touches ensure functionality and durability. Sealing and reattaching fixtures are essential for a watertight fit and a polished look.
Seal Edges with Caulk
Sealing the liner edges with caulk stops water leaks. For best results, apply professional-grade, mildew-resistant silicone caulk. Begin by cleaning the edges so they bond well. Cut the caulk tube at a 45-degree angle to provide a controlled application. Spread a smooth bead where the liner intersects the wall and tub deck. Apply a damp finger or smoothing tool to force the caulk into the joint, making a clean edge. Let the caulk dry for at least 24 hours before getting the area wet. Inspect the seal regularly, particularly in steamy bathrooms.
Replace the Fixtures
Be very careful when replacing fixtures, like the faucet and handles, to ensure that there is no incidence of leaks. The tailpiece of the drain must be hooked onto the waste line and tightened using plumber’s putty surrounding the strainer. Tighten all the connections, but avoid overtightening them in order to protect the liner. If the tub needs leveling, make sure it is leveled to the finest detail so that water does not collect. After the fixture has been installed, inspect for leakage or misalignment and buff it all up for a shiny appearance.
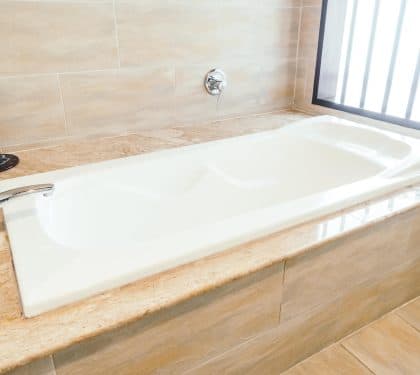
Bathtub Liner Over an Existing Tub
A bathtub liner installs directly over your existing tub, so we never tear out the old one. We measure your current bathtub, mold a custom bathtub liner to its exact shape, and bond it on top. You get a fresh, watertight surface in about a day, with no demolition, no plumbing changes, and no long downtime. For a worn but structurally sound tub, a bathtub liner over the existing tub is the fastest route to a like-new finish.
Install Your Tub Liner Properly With Our Experts
Tub liner installation provides an easy method of beautifying your bathroom without a full remodel. Utilities and a keen eye result in longevity for this project. A well-set liner not only beautifies your tub but also eases the maintenance of the tub. Whether you will do it by yourself or hire professionals for it, a little work now will pay dividends for decades to come. Thus, for anything you may require related to guidework or choosing the right materials, we shall help you every step of the way. Let’s create a space you will fall in love with!Contact us at TurnKey Bath Remodel.
Your Bathroom Remodel Is in Good Hands
TurnKey Bath Remodel is licensed and insured (Louisiana Residential License #890459, Commercial License #3667) with over 25 years of experience serving the Greater New Orleans area. Our acrylic bathroom products come with a lifetime guarantee warranty, and tile installations are backed by a 10-year workmanship warranty. Most bathroom remodels are completed in as little as one day, with 0% financing available. Schedule your FREE consultation or call (504) 513-6366 today.
Here in the New Orleans area, where Gulf humidity is a constant, a tub liner’s moisture-resistant surface is a practical way to refresh a tub without a long, messy demolition. At TurnKey Bath Remodel, we fit liners for local homes of every age, from historic houses to newer builds.


 Measurement is of great importance. Use a tape measure to measure from one end of the tub to another along its length, its width, and its depth. Consider also any curves or angles. Measure at more than one spot to account for inconsistencies, like if flared walls are present, ensuring the liner fits perfectly without any gaps.
 In order to gain access to the tub surface for cleaning, remove hardware like faucets and drain covers. Use a screwdriver or wrench to carefully remove each part, saving screws for use later. If any of the hardware is rusted or broken, it would be best to replace it.